
If you’re looking for an easy but impressive dessert to make, look no further than caramel slices. This recipe is simple enough that anyone can do it, but it’s still impressive enough to wow your guests. Best of all, there are only a few ingredients required so it’s quick and easy to put together. But how to cut caramel slice?
What is a caramel slice?
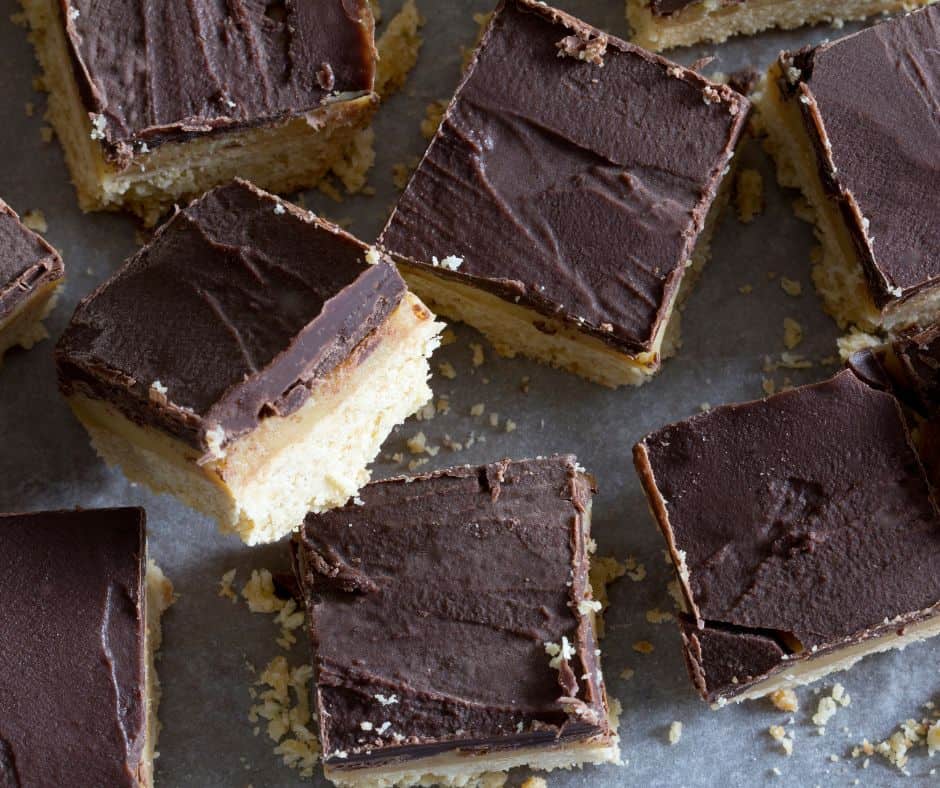
It’s essentially a layer of caramel sandwiched between two layers of cookie or biscuit. The result is a sweet and sticky treat that’s absolutely delicious. If you’ve never made it before, don’t worry – it’s really easy.
Homemade caramel slice recipe
Ingredients:
Biscuit Base:
1 cup (250g) unsalted butter
1/2 cup (110g) brown sugar
2 cups (300g) plain flour
1 tsp baking powder
Caramel filling:
1 can (395g) sweetened condensed milk
1/2 cup (110g) brown sugar
1/4 cup (55g) unsalted butter
1 tsp vanilla extract
Chocolate Topping:
1/2 cup (110g) dark chocolate, chopped
Method:
1. Preheat oven to 160°C (325°F). Grease and line a 20 x 30cm slice pan with baking paper.
2. To make the base, mix the melted butter and sugar together until light and fluffy. Add the flour and baking powder and mix until well combined.
3. Press the mixture into the prepared pan and bake for 15 minutes. Set aside to cool.
4. To make the caramel layer, combine the sweetened condensed milk, sugar, butter, and vanilla in a saucepan over low heat. Cook, stirring constantly, for 5 minutes or until the sugar has dissolved.
5. Pour the filling over the base and spread evenly. Bake for a further 20 minutes.
6. Allow to cool completely before topping with chocolate. Melt the chocolate in a microwave-safe bowl, or over a double boiler, you can add coconut oil to help thin and spread it. Pour the melted chocolate over the caramel topping and spread evenly.
7. Place in the fridge for 1 hour or until the chocolate has set. Cut into squares and serve.
Notes:
– If you find the caramel filling is too thick, simply add a little more condensed milk until it reaches the desired consistency.
– To make cutting the slice easier, place it in the freezer for 15 minutes before cutting into squares.
This is the easy caramel slice recipe that you’ve been looking for. With just a few ingredients and minimal effort, you can have a delicious and impressive dessert that everyone will love.
How to cut caramel slice?

There are basic steps to follow when cutting caramel slices which are as follows:
1. Pre line the baking tin with baking paper
Before you start slicing, make sure that you greased the baking tin lightly so the baking paper will adhere. This will help ensure even slices.
2. Let your slice rest for at least 12 hours before cutting into it.
If you have the time, always leave your slice overnight before cutting it. This will result in clean cuts and fewer broken pieces.
3. Find the perfect knife
For best results, use a sharp knife to make clean cuts. A serrated knife will also work if you don’t have a sharp one.
4. Use a sawing motion when cutting
This will help ensure that you get even slices without any crumbs or unevenness.
5. Wipe the knife clean between cuts
To avoid a sticky mess, make sure to wipe the knife clean after each cut. This will also help ensure that each slice is as clean as possible.
With these tips in mind, cutting caramel slice will be a breeze! So go ahead and enjoy this delicious treat!
How long will the chocolate caramel slice last?
Chocolate caramel slices will last for up to a week when stored in an airtight container in the fridge. Alternatively, you can freeze the caramel slice for up to 3 months. Let thaw overnight in the fridge before enjoying.
Now that you know how to cut caramel slice, go ahead and enjoy this delicious treat! This favourite sweet treat is perfect for any occasion and is sure to impress your friends and family. So don’t wait any longer – get slicing!
For other kitchen tips, check the following articles:
Say Goodbye To Burnt On Food: How To Clean Oven Trays
How To Get Your Non-Stick Pan Looking Like New Again: Tips On How To Clean Non Stick Pan